Fences are sometimes used to protect newly planted trees or to enclose areas which need to regenerate. They control access of people, wildlife and grazing livestock and are often built in conjunction with footpaths or other forms of access work. Different types of fences have been devised to suit particular habitats and functions.
Hands-on techniques on how to build a fence
Clearing the fence line
Make sure the fence line is clear of undergrowth, overhanging vegetation and old fence materials so that you have room to work.
When replacing or repairing a fence, try to leave old fence posts in place as they provide great habitat for lichens.
Locate the straining and turning post holes accounting for changes in slope and direction of the fence line.
Digging a post hole

Mark out with a spade the size of the hole. The dimension of the hole must be:
- Wide enough to allow firming up around the post to be carried out.
- Of sufficient depth (approx 30 % of total post length) to ensure the stability of the post after backfilling.
NB Stone filling only works really well with square posts. If no stone is available use soil tamped down in layers.
Post and rail fencing
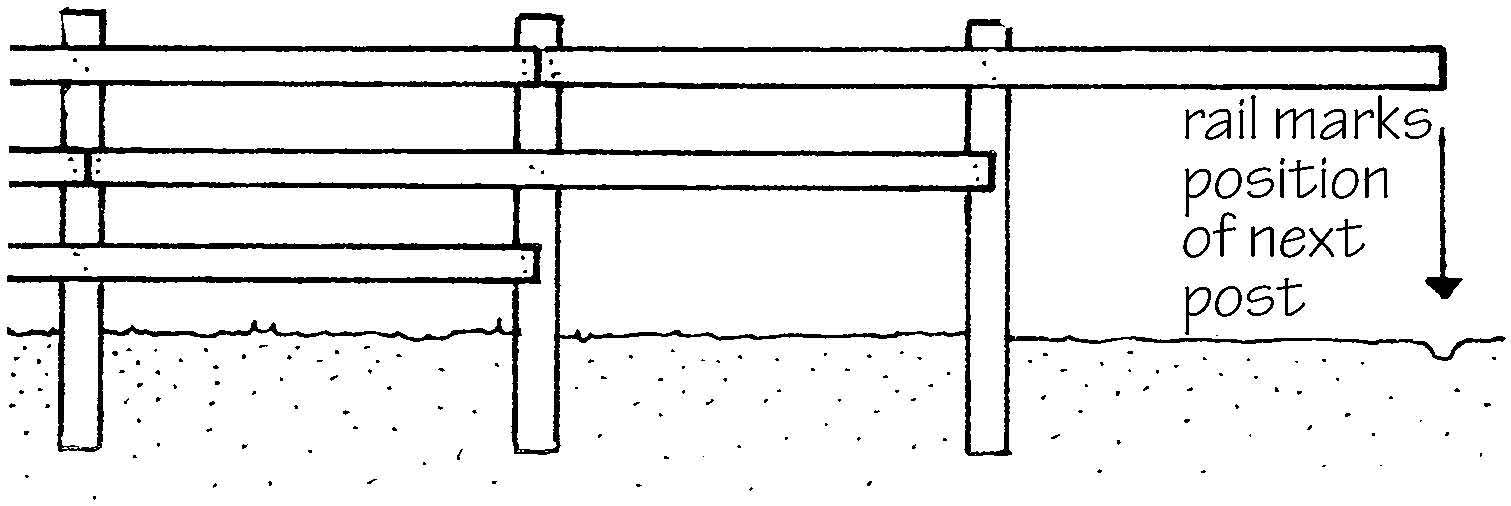
Nail the rails with galvanized nails driven in at an angle, ensuring the nails are not directly above one another and are set a few centimetres apart.
Working in pairs attach the rails to the posts ensuring rail ends are staggered.
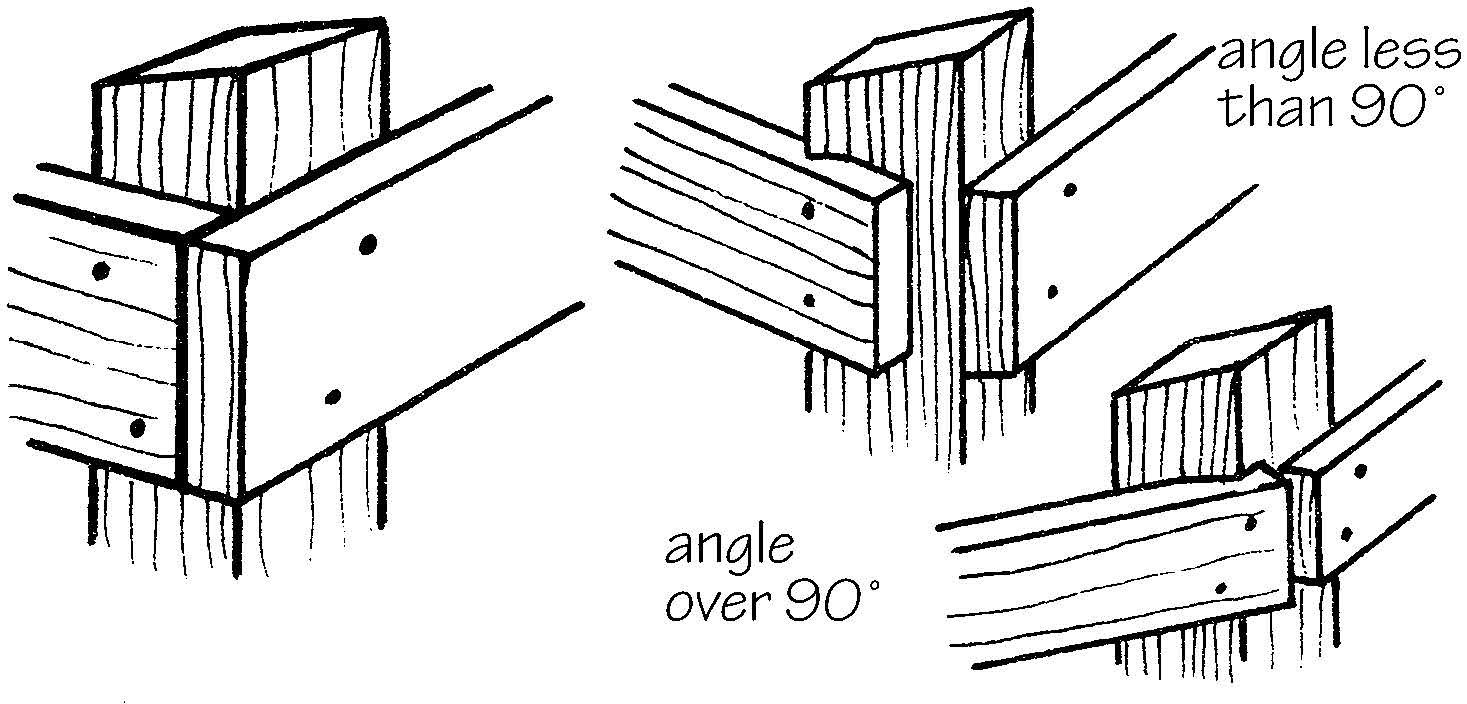
Changes in direction can be made by cutting and sinking in the rails into the post.
Post and wire fencing
Dig in straining and turning posts.

Excavate a hole for the posts as instructed opposite.
Cut a slot in the base of the hole to allow for a cross piece (foot) to be attached to the post.
Next to the cross piece place a large stone (heel stone) at the base of the hole. Backfill ensuring tamping in layers.

Attach the struts on opposite side from strain.

Fixing the line
Between turning points, attach a temporary wire, low own, ensuring it is not too tight and does not catch the ground. This will then guide the siting of the intermediate posts.
Driving in intermediate posts
Intermediate posts should be 23m apart for stock fences, about 4m apart for rabbit fences.
Take care to ensure the posts are upright and in line. While two people drive a post in, a third should be checking that it is straight.
When using a drivall be particularly careful that the post is upright and the people using it wear safety helmets.
Straining and stapling
Strain and staple up the top wire first and work downwards.
Use a measuring stick to get the correct height and spacing of the wires.
Knock down any posts that are too high as you go along. On uneven ground you may have to allow some variation in height and spacing to achieve a smooth line.
The arm on the wire strainer is adequate. Don’t add anything to give extra leverage.

Staples should be put in diagonally and only driven home on straining posts. On other posts the wire should be free to move.
To finish off, saw off any minor damage to the posts, nail up splits and ensure cut wire ends are sunk into the posts.
Rabbit netting, chain link and palings
These need to be supported by a line wire top and bottom, with a centre line on tall sections. Construct the fence as a post and wire fence, then attach the netting and pull it tight by hand. Do not try to strain rabbit netting. Fold back away from area to be protected. The netting should be attached to the line wire by pig rings or similar devices.
Woven field netting
Also known as pig netting or ryelock.
This does not usually need to be supported by line wires except on long runs.
Erect the netting once the intermediate posts are in place.
Use a stretcher bar to ensure equal tension in all lines, or use two wire strainers in tandem: strain up and fix the top and bottom wires, then work inwards.
When joining netting overlap it by at least two meshes; don’t join it end to end. The use of gripples or joint blocks is also acceptable.
Season
Any time of year, and the relatively high amount of physical activity involved can mean it can be done on colder days.
Preparation and working with groups
Site Visit
Visit the work site in advance to gain a clear idea of what you will be doing on the day.
Assess the suitability of the project for the group you will be leading and the time available.
Work out the exact line of the fence and the positions of the straining posts. These are usually determined by the lie of the land (a post at every change of direction or major change of gradient), but straining posts can be up to 110m apart, although 50m is preferable.
Undertake a risk assessment for both project and site.
Tools and equipment
Depending on the size of the team adjust the quantity of equipment taken to the site. Ensure the tools are in good condition before using them.
- First aid kit
- Appropriate protective gloves
- Fencing gauntlets
- Impact grade goggles
- Safety helmets
- Spirit levels
- Lines and pegs
- Tape measure
- Wire cutters
- Fencing pliers
- Surform
- Crowbar/pinch bar
- Wrecking bar/swan neck
- Drivall
- Tamper or punner
- Claw hammer
- Mallet
- Wood chisel
- Spades
- Shuvholers
- Bowsaw
- Mell or maul
- Wire strainers
- Stob holder
- Wire twister
- Staple extractor
Ensure all team members are wearing appropriate footwear and clothing and issue specified safety equipment.
Introduction
Introduce the site, the work and the reasons for doing it.
Walk the line of the fence explaining what work will be undertaken. Identify potential hazards and explain how to work safely around them.
Lay out materials, describe any potential problems and indicate the positions of the straining posts (decide upon these now if you have not already done so).
Demonstrate tool use
Demonstrate and explain the safe use, carrying and onsite care of the tools before starting work.
Refer to the TCV Hand Tools booklet [coming soon].
Demonstrate work techniques
Demonstrate all new work techniques as you come to them. This will save mistakes and avoid accidents.
Demonstrate correct lifting technique (bending the knee and keeping the back straight so that the leg muscles are used and the back is not strained).
Organisation of team
Divide the team into pairs, teaming beginners with more experienced fencers.
The most efficient way to work is to form a production line, each team doing a specific job. Pairs can be swapped around at tea or lunch breaks.
Try to finish a certain length per day, rather than leaving more started than unfinished
Ascertain how stockproof the fence has to be between work periods and leave it that way.
Ensure any post holes are filled or covered overnight.
The leader should check, assist and encourage people and ensure work standards are maintained.